How to Patch a Ceiling in 5 Simple Steps
- Chris Taylor
- Dec 9, 2023
- 2 min read
Have a plasterboard ceiling with a hole in it bigger than 20 mm? Let's have a go at fixing it. You will need:
Piece of plasterboard, e.g. Gyprock SuperCeil
Screws with flat tops (optional but gives extra strength)
Carpentry glue (optional but gives extra strength), e.g. Selley's Liquid Nails
Fibre mesh tape
Wall filler compound, e.g. Polyfilla Multipurpose Interior Powder Filler
Let's get started!
Cutting Out
First, measure the dimensions of the panel you'll need. If your hole is bigger than about 300 mm then consider including two joists. If you look closely, you can see the nail marks running along the joists in the ceiling. The ceiling panel joins should be perpendicular to the joists.
Cut the plasterboard panel to size.
If you have a light cover, remove it. I accidentally smashed one by not removing it. Remove the light as well if you don't need extra light while working. The plate at the ceiling can often be removed.
Holding the panel to where you want to place it, trace around it. Cut the hole slightly smaller than the panel using a box cutter knife, keyhole saw and wood saw. Watch out for electrical cables and pipes - I had to hold the cable for the light while sawing. Consider turning the power supply off.

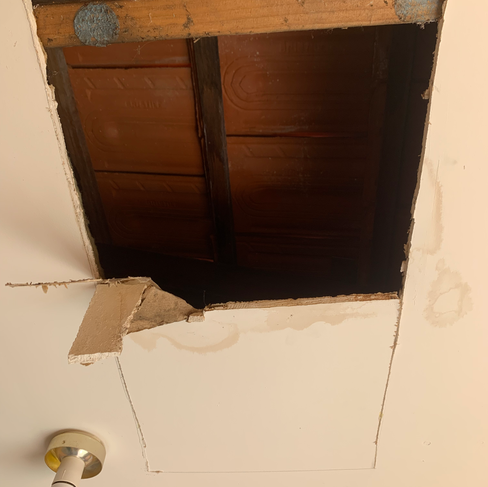


Next is the most tedious part. Keep inserting the panel, starting at one end, and trimming away the edge of the hole until the panel fits.

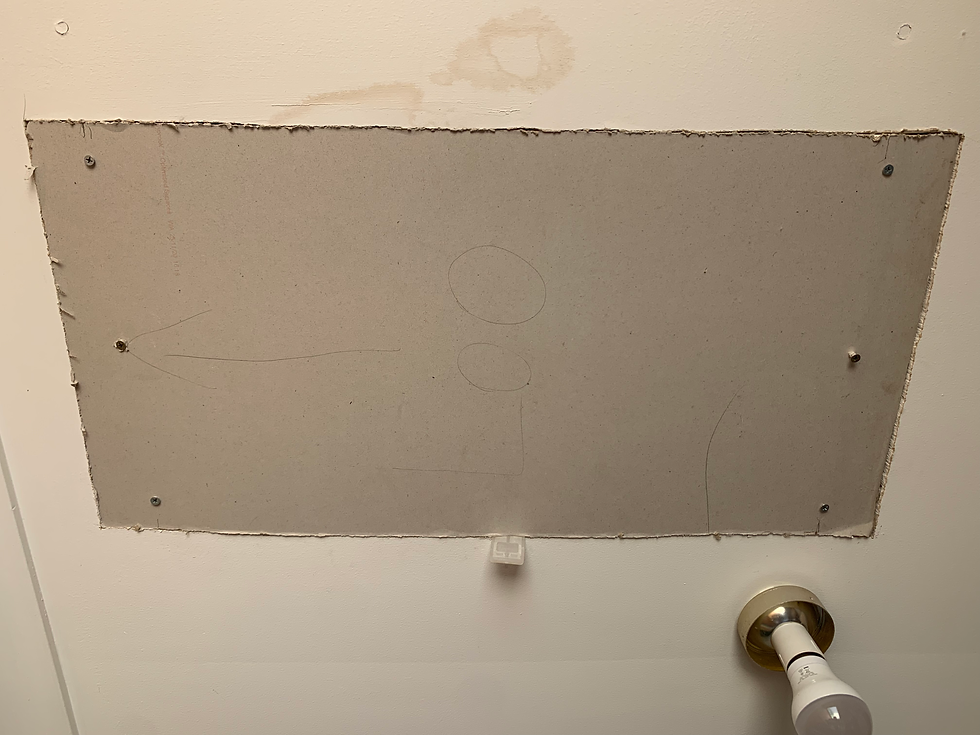
Securing in Place
Screw the panel to the joists. If the hole wasn't big enough to warrant exposing the joists, in place of the joists, screw to two pieces of scrap wood or another piece of plasterboard.
Put in a few more screws until the panel is stable and kind of flush with the ceiling. (We will make it more flush with the glue.) As there is ceiling damage from a leak, our ceiling may have distorted from the water but still be strong enough to use.
Make sure there is a gap wide enough to insert the glue, a sharp scraper can be useful for this.
Use the caulking glue along an edge and prop it up wherever the edge is not flush, to make it flush. I cut two old stakes to the right length and a ladder.
Keep gluing and propping until it is reasonably flush (about 1-2 mm we can bridge with wall filler). Before removing props, follow the instructions on the glue for setting time, in particular for strength.


Making It Look Pretty
Now we don't want to leave it like that, do we? Let's tidy up.
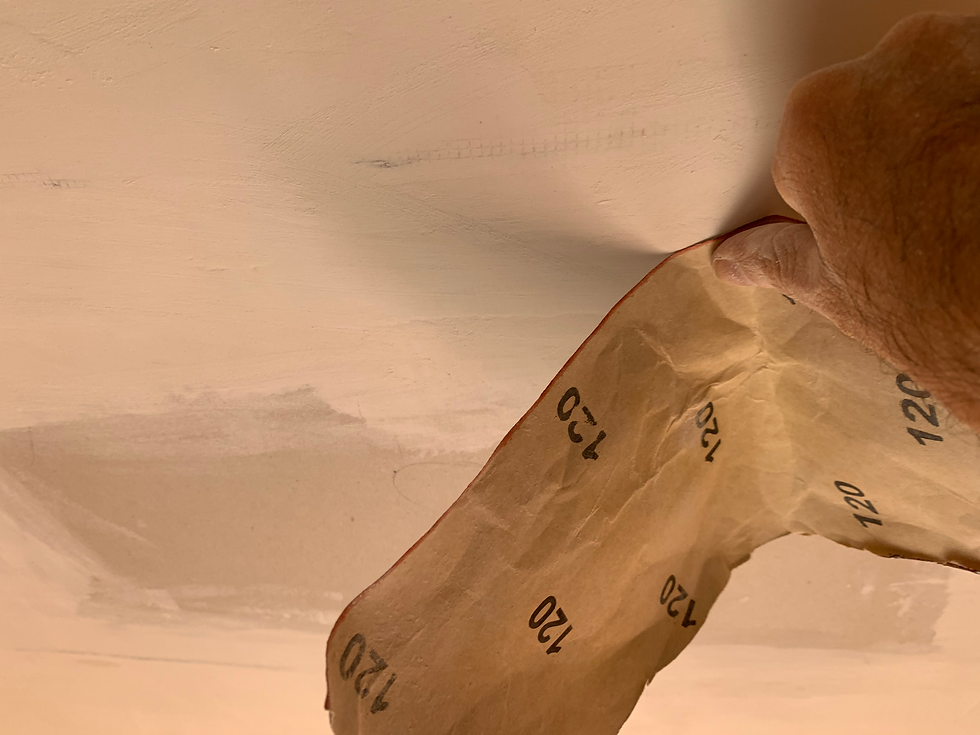
First, trim off and sand the excess glue and loose plasterboard paper or other bits.


Screw in flush or remove screws. I kept two screws.
Next, apply the mesh tape. Make sure there are no overlaps.

Fill over the tape with the filler. I prefer the powder to the pre-mixed filler as it has better consistency. I tried a pre-mixed one (Selley's Spakfilla Rapid) and made a huge mess on the floor. After trying the pre-mixed filler, I allowed it to dry then used the powder that is mixed with water (Polyfilla Multipurpose Interior Powder Filler).


Sand any irregularities with sandpaper. I didn't worry too much about exposing the mesh a bit because it's going to get painted over. If in doubt, apply more filler.
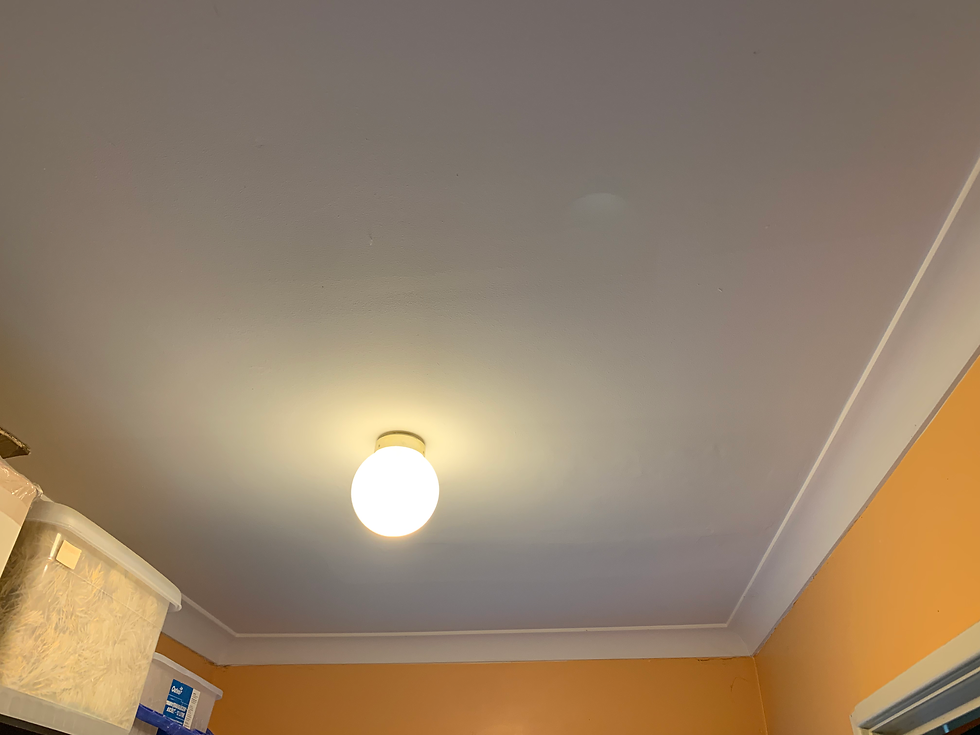
Then, paint it.
Comentarios