Special Effects - Combining Two Videos Using iMovie
- Chris Taylor
- Jan 20, 2023
- 4 min read
Updated: Sep 1, 2023
You can actually combine two videos together to create a new scene. This is possible with consumer level software. Whether it is for advertising, your romantic partner or just for a laugh, it can be done. This tutorial is for making a special effects movie using iMovie on a Mac computer. Even if you don't have a Mac, don't worry - there are loads of video editors.
Recording the Video to Insert Into
Record the scene you would like to insert into or find one you like. Consider copyright implications if you found the video online.

If necessary, you can crop the video on the phone to remove unwanted background. Most modern video players on computer or phone can do this.
Record the Video to Insert
You can use a video with a green or blue screen and if you want, shrink the object in the video. Alternatively, you can record a video, remove the background with a program capable of AI (which iMovie isn't) then add space around to effectively shrink the object.
Merge the Videos
Open iMovie and click on Create New Project.

General Arrangement and Timing
Import the video you would like to paste into, i.e. the base video. You can drag and drop.

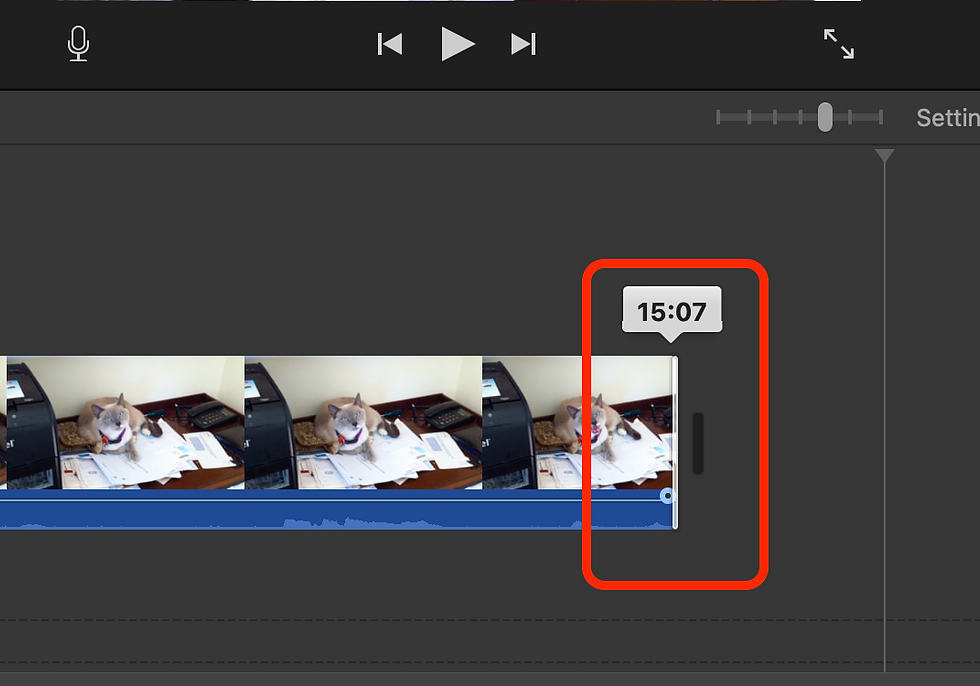
Drag the video to the timeline or click on the video then click the Plus button.

Adjust the view to the level of detail you want (I wonder if it's called 'time zoom'?).

Trim the video to just the section you want. This can be reversed simply by re-adjusting.
Insert the video you want.


Speed up or slow down the overlay video to match the base duration (optional - can look funny).

The playback speed can also be adjusted/reset here.

Trim the base video to match the overlay video duration (or however you would like to do it).

Select the overlay for editing.
Adjust Green/Blue Screen (skip if the background is already transparent)
Make the overlay background transparent if it isn't already. If it is already transparent, skip this step.

Remove as much of the artefacts as you can using the crop and eraser. If it makes it look worse, choose Edit -> Undo (or Command-Z).


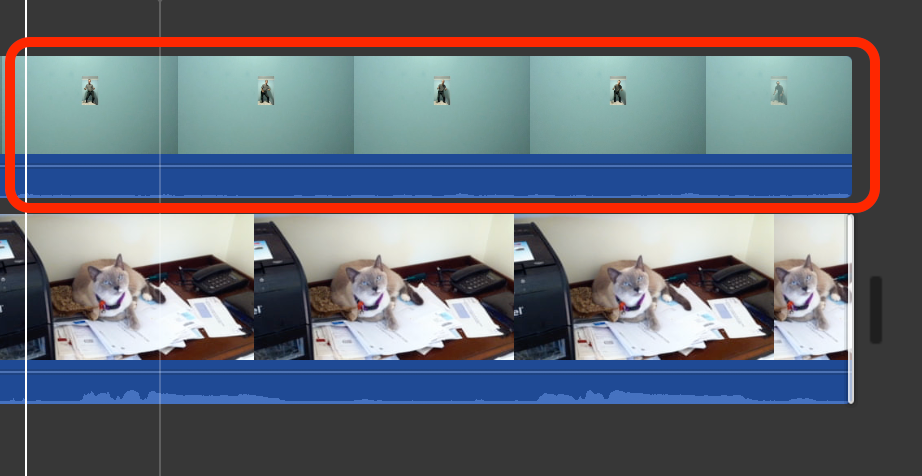
Adjusting the Spatial Positioning - Overlay Video Cropping
First select the frame we are controlling, usually the start or end. In this case I want to be right on my cat's head.

This step can only move or zoom into / grow the overlay video relative to the original clip. Variable cropping, aka the Ken Burns effect, is very cool and worth playing with. It allows you to make the object move, grow or shrink when you play the video. For this particular video of me on my cat, it may look a bit odd. If you're not keen, skip this step.
It can take a bit of getting your head around but a smaller start/end rectangle means a bigger object and moving the start/end rectangle one way moves the object the other way.
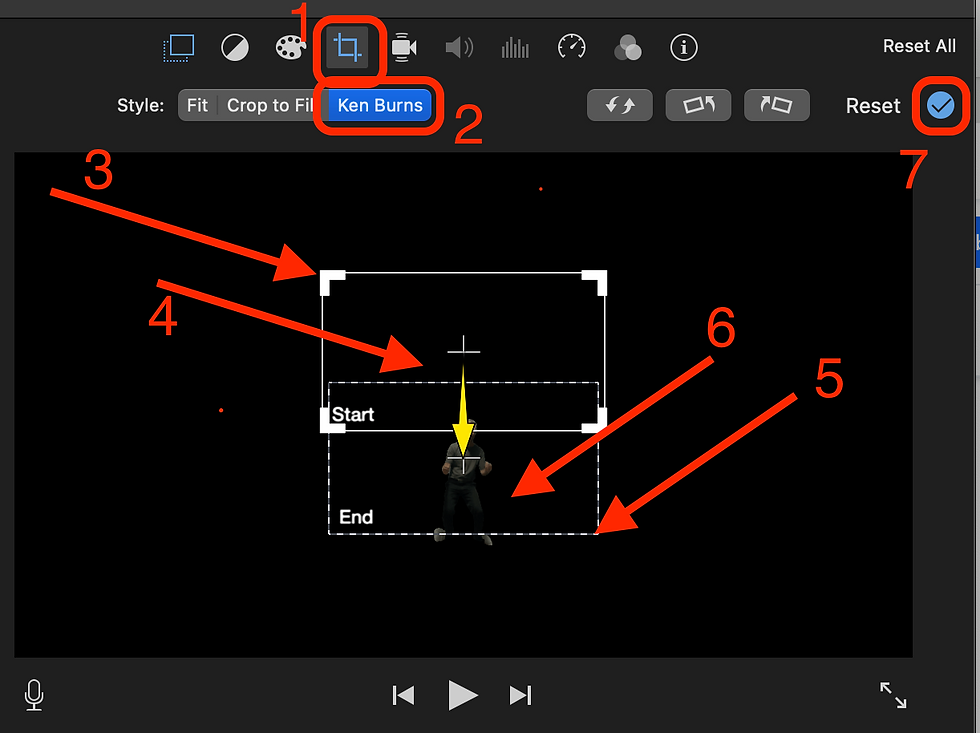
If you used a green/blue background, you are controlling a second frame in your clip or you did not put enough space around the object for the next step, you need to repeat (1) and (3) through (7) by trial and error until it looks right. Otherwise, you can do it a bit roughly and refine in the next step.
Adjusting the Spatial Positioning - Overlay Video Using 'Picture In Picture'
If you used a blue screen, consider using an external application or tool to remove the background instead, otherwise iMovie won't give you this option. This step is very useful and easy to follow compared to the other ways of adjusting spatial positioning. Otherwise, skip this step.
Set up Picture in Picture. Resize to the size you want (4) before moving it to where you want (5). If you made the object move or grow outside the rectangle while using the Ken Burns effect in the previous step, the object will 'cut out' at the border you are editing here. If you don't want this, make sure this border is at or beyond the edge of the frame. You may need to adjust in the previous step again.

Adjusting the Spatial Positioning - Base Video Cropping
If you are already happy with positioning, skip this step.
Adjust the base video. Use Crop to Fill to use the same crop for the duration of the clip, otherwise use Ken Burns to make the start crop different to the end crop. Very cool for motion/zooming/growing/shrinking. (If you want to see if you can give yourself motion sickness, use the Ken Burns effect for both the object and the background at the same time! 🤢)
First, select the background clip for editing.

Next, click the frame we are controlling, typically the start or end.
Notice you can only grow the clip / zoom in relative to the original. Zooming out is not supported - that would have needed to be done elsewhere.


And keep doing the below in a loop until it looks right.

Finalising
Silence the audio in one or both video clips.

Export the video.

Done! Enjoy the one I made 😉
With 'blue screen' (bedroom wall). Notice it is a bit washed out:
With AI background removal by Unscreen. Notice it is just 5 seconds long and has some artefacts:


Comentários